In the French Quarter Dress

I look for inspiration everywhere and anywhere. It can be a bit of fabric, some trims, buttons, zippers (!), books, the internet, you name it. A bit one for me is Modcloth. It’s a good thing they’re not a brick and mortar shop here in Australia or I would have bought out the whole place. It just suits my style. Lots of full skirts, interesting necklines, cute knits, and whimsical prints. I’ve ordered a couple of items before both for myself and Bee but most of the time my wishlist comes to ridiculous proportions. It’s rare that I actually buy anything; I’m never sure just how it’s going to fit and what quality the fabric will be. Anywho, I love looking at all the pretty pictures and getting inspired. It’s an amazing resource for looking at pre-existing designs and translating them using the various patterns you have on hand.

Personally I prefer a slightly lower neckline, as it suits my figure. Wearing things with high necks is just not flattering on me, which is unfortunate as there are loads of beautiful vintage style dress patterns available at the moment with raised necklines. Alas, it was not to be.

But I seem to be rambling. Back to the point, I fell in love with the ‘Profesh Opinion’ dress on Modcloth .

profesh opinion dress

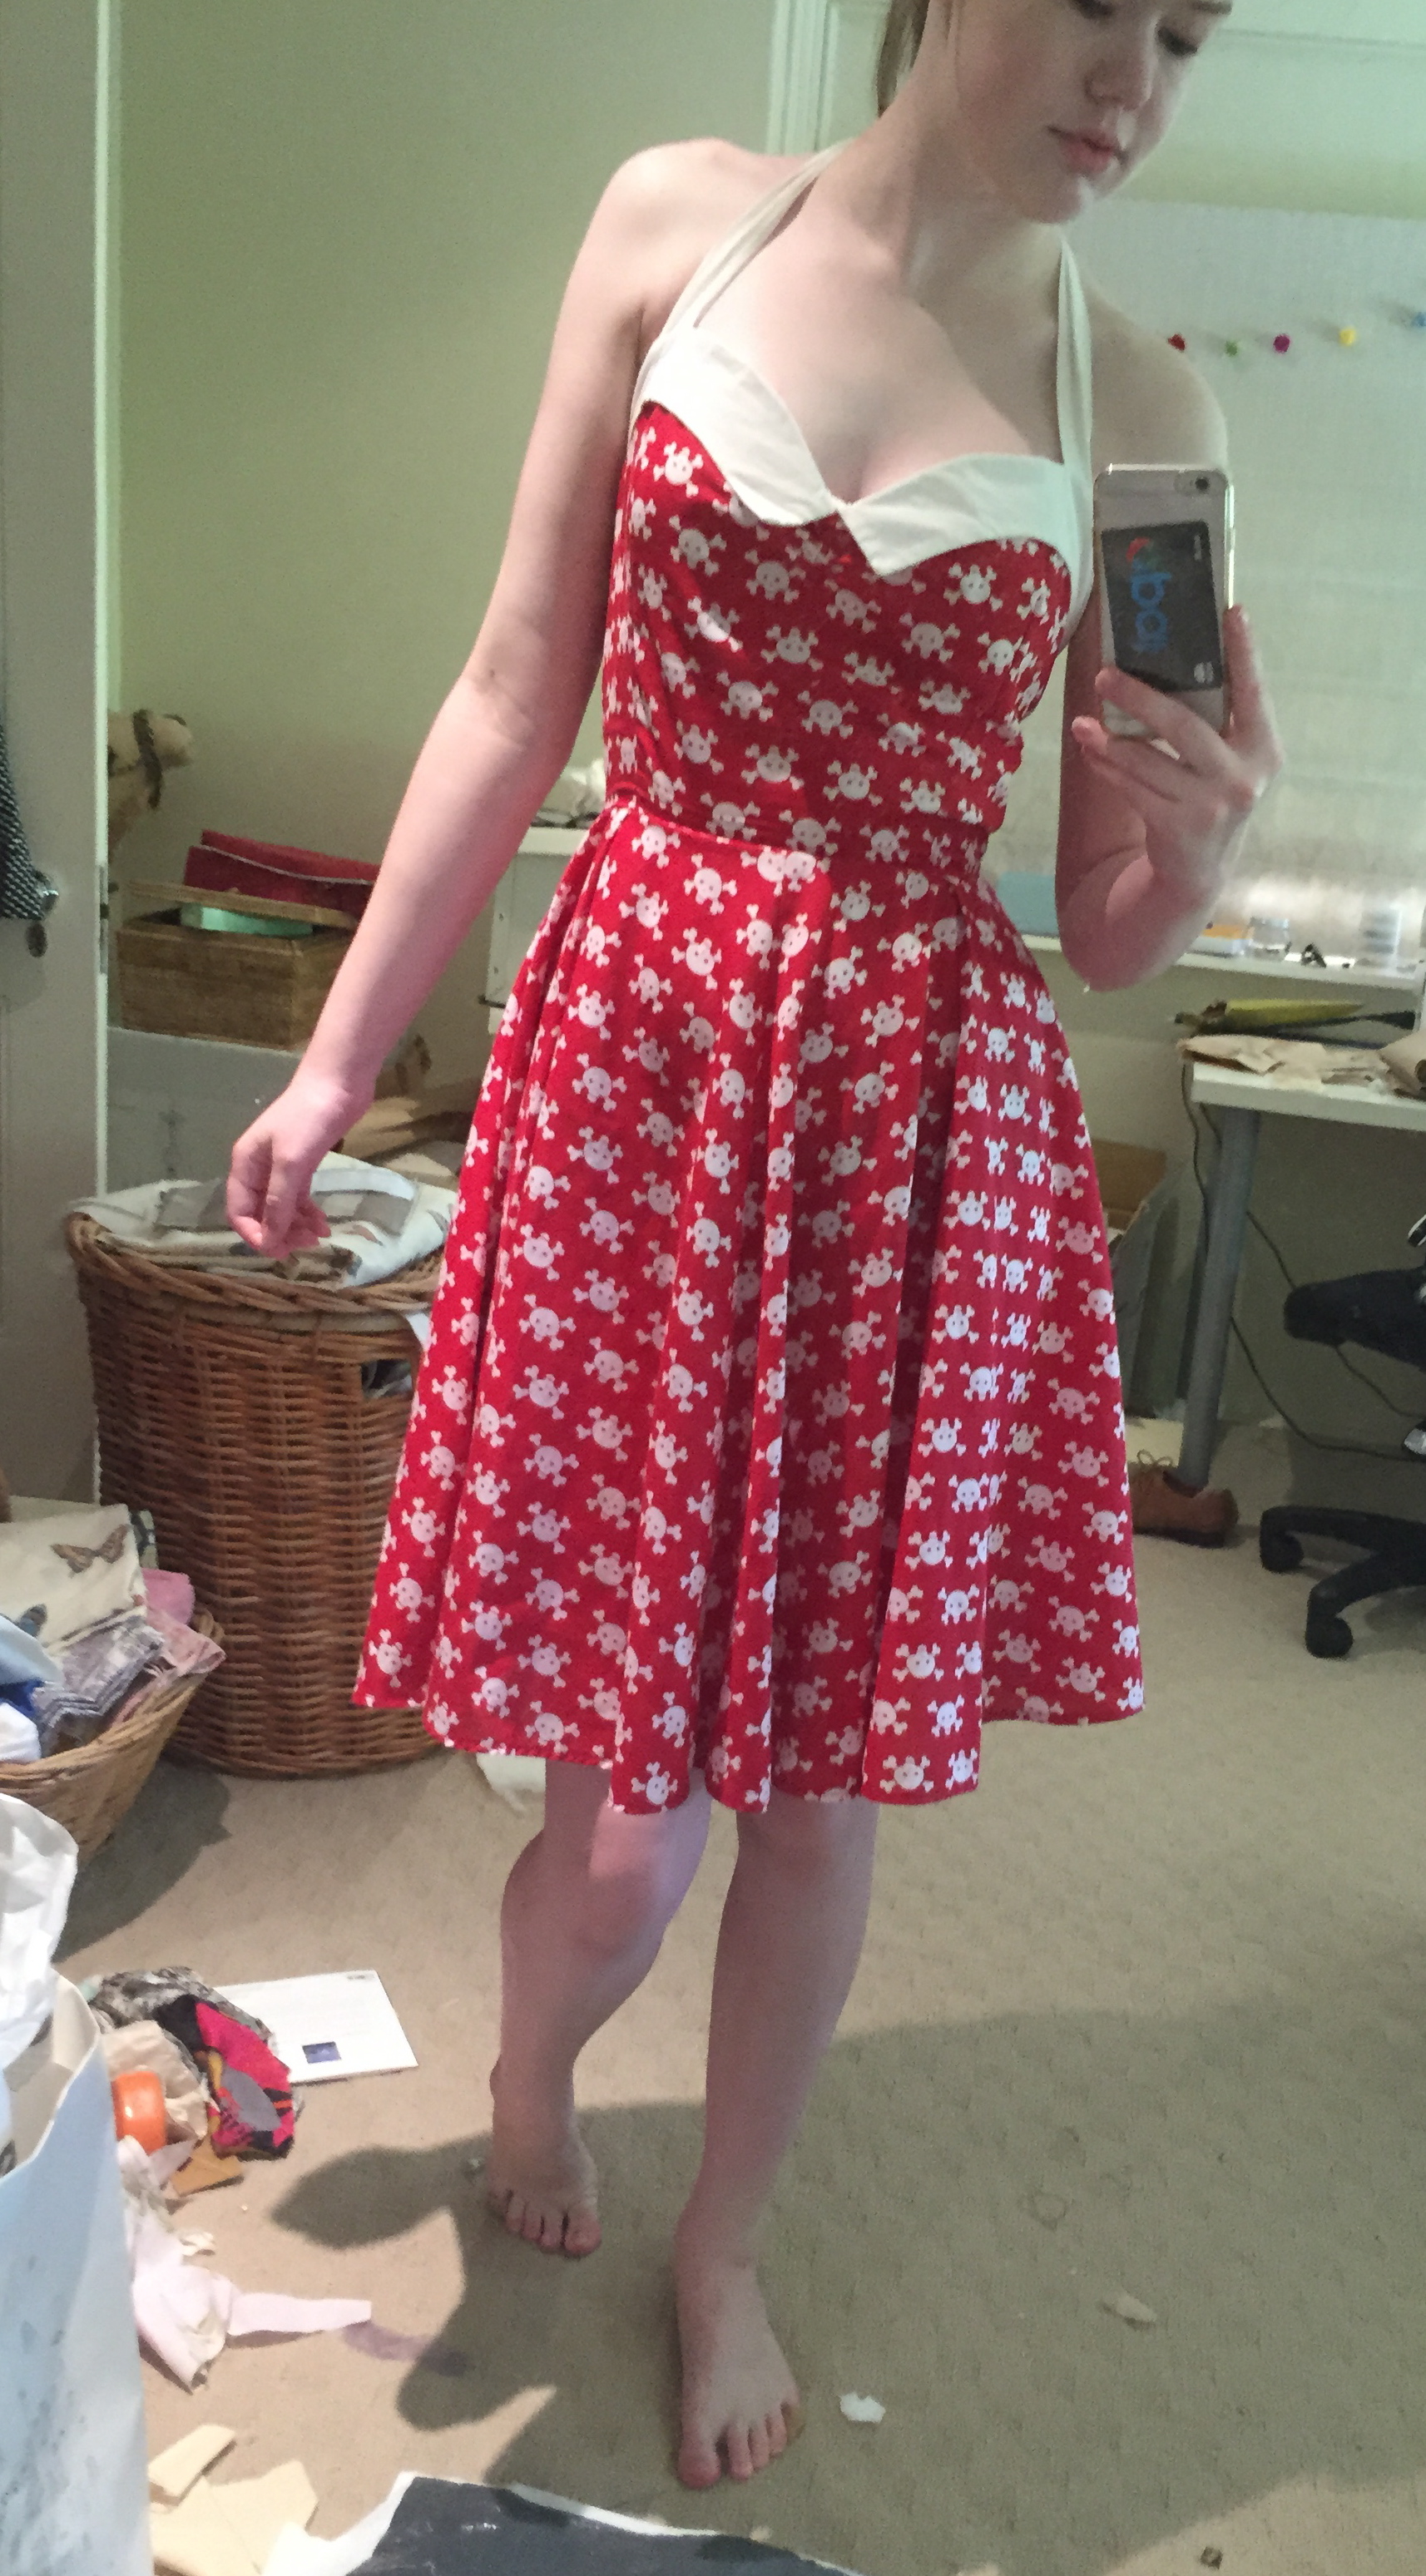
Just gorgeous. But there were a few things about it I wanted to change for my version. Firstly, swap the cowl neck for a scooped neckline. I couldn’t find a pattern anything like the open back so went with my TNT Kim bodice instead. While the pencil skirt is beautiful isn’t not what I would wear in real life. I do a lot of running around, and combine that with sweltering summer temperatures, I need a bit more air around my legs. Out came New Look 6242 with its pleated skirt.

IMG_2773

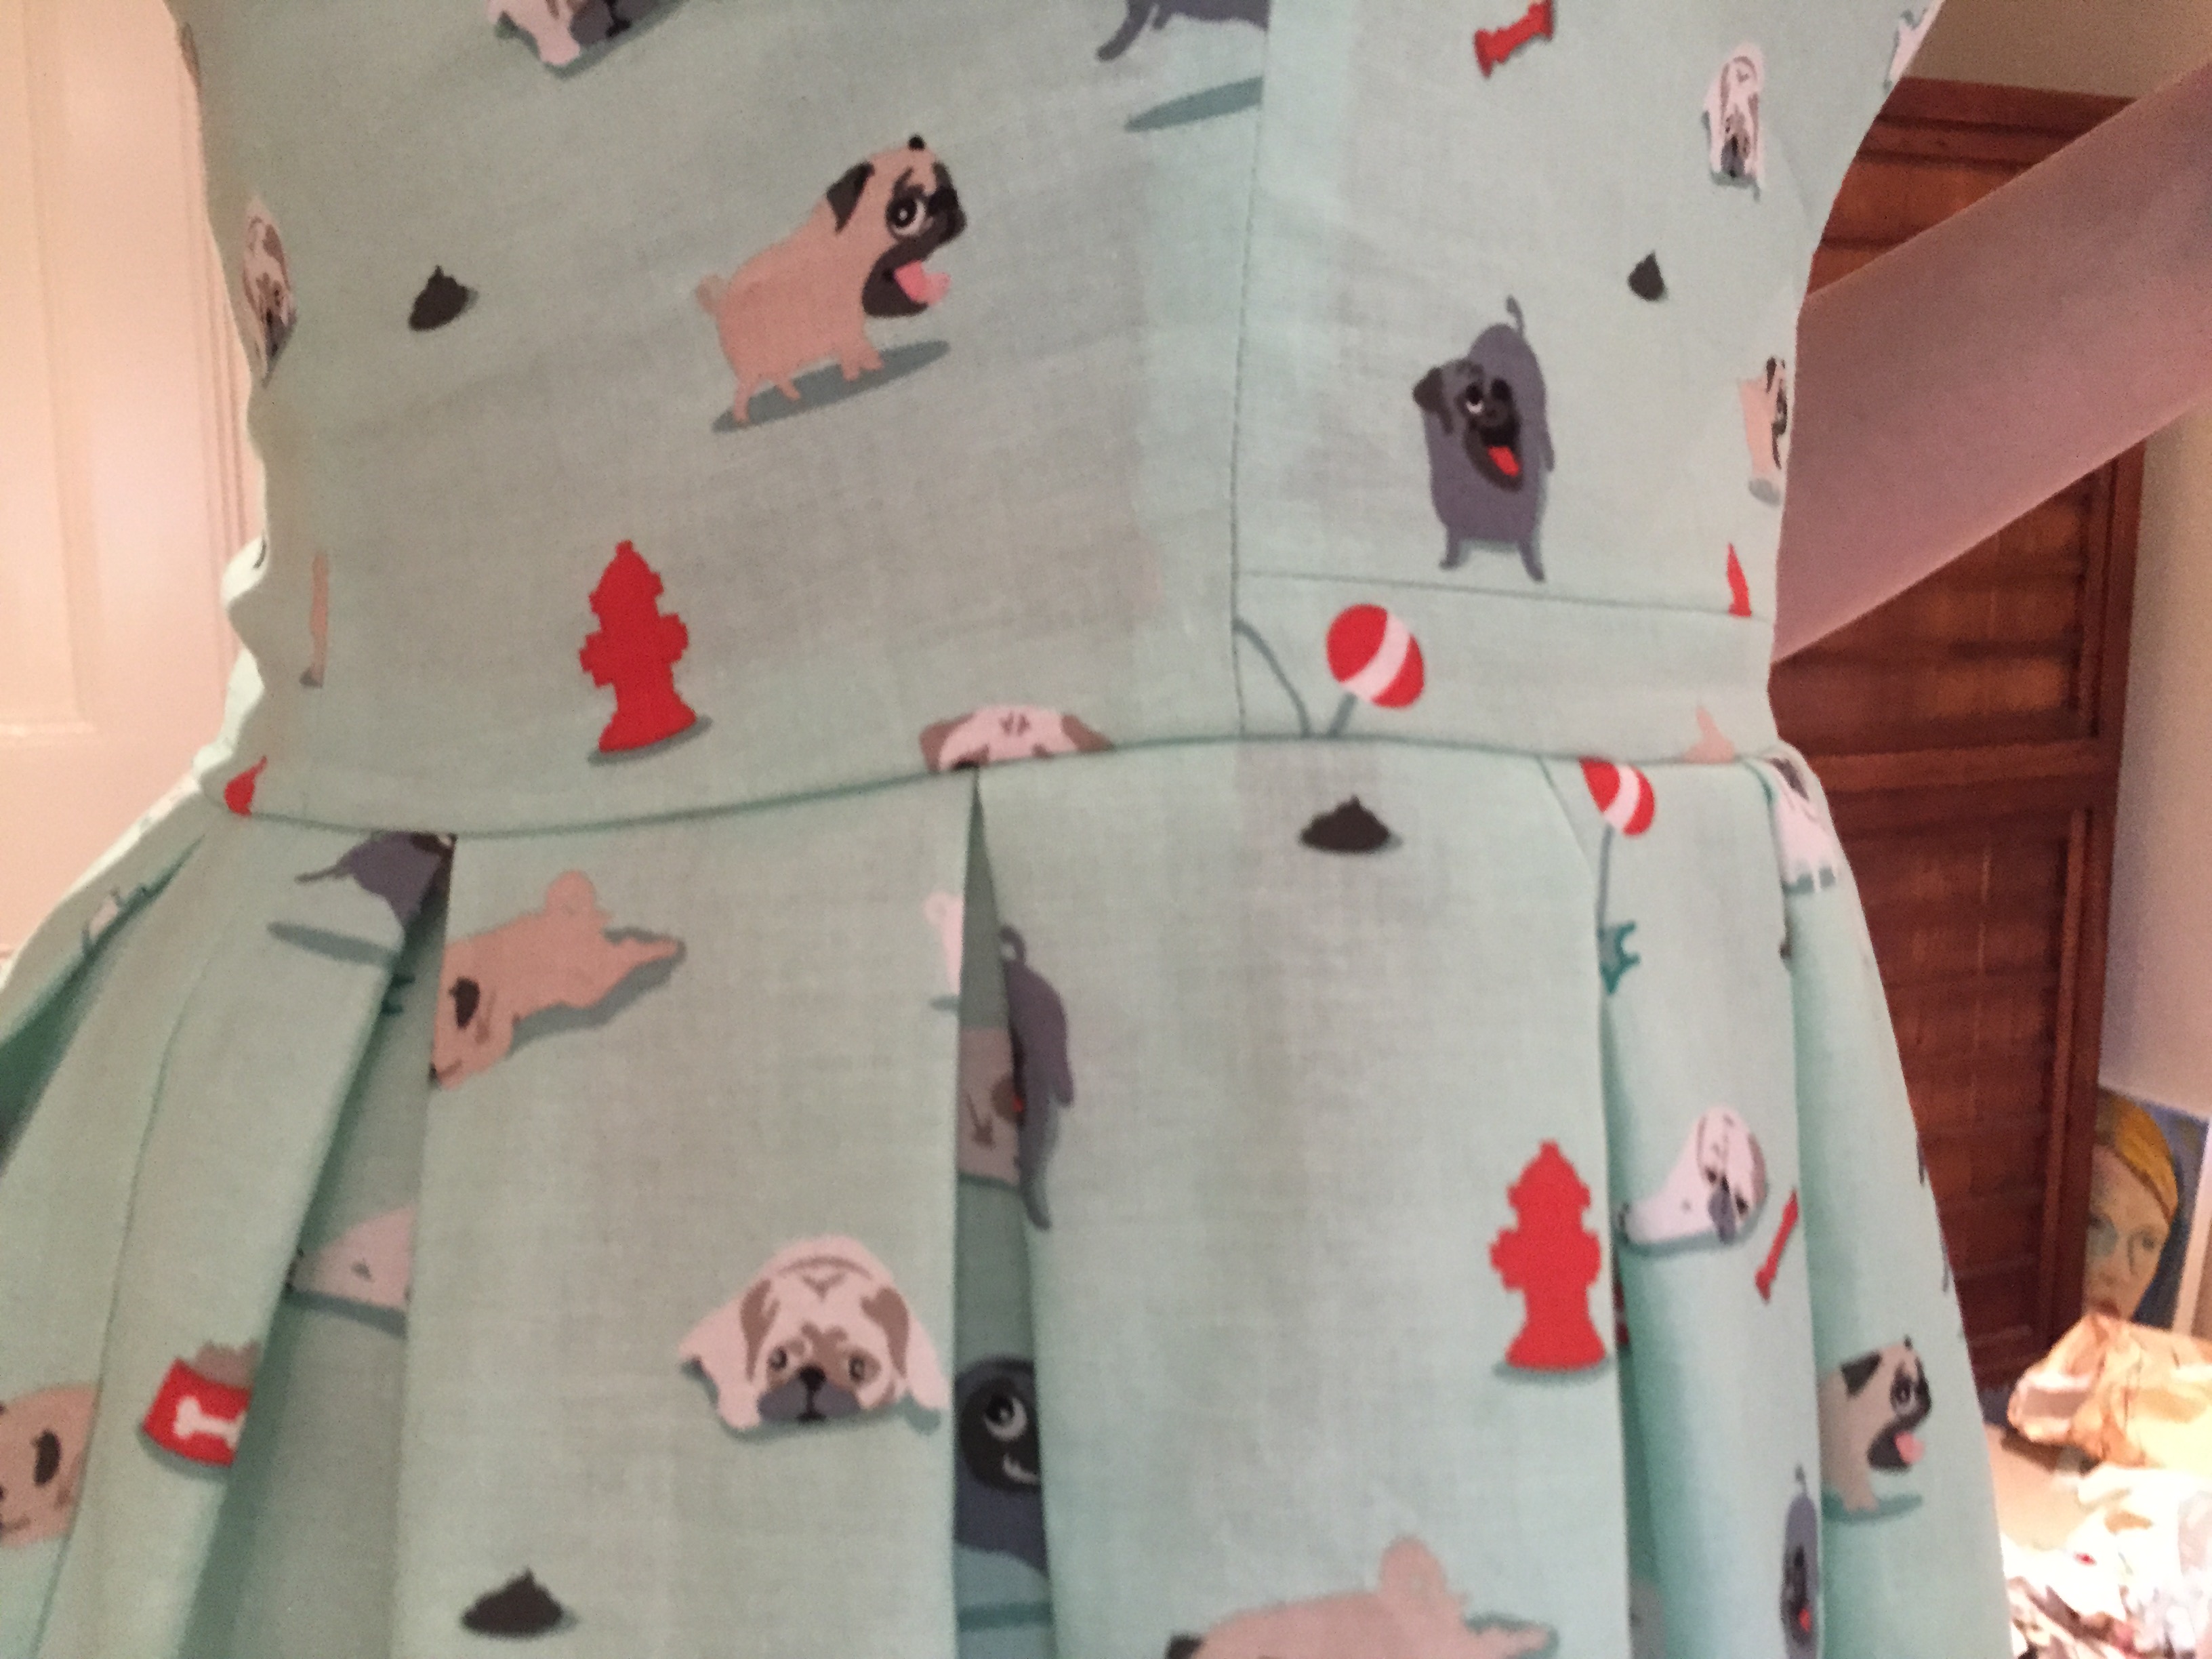
I think it turned out pretty spiffingly if I do say so myself. I made a few little adjustments to get the fit just right but apart from that it was quite a straightforward sew. As usual with the Kim dress bodice, I lengthened it by 2cm and took in the back seam. The last time I did this skirt (MOUSTACHE) I need to take it in slightly at the waist, so I pre-emptively sewed the skirt side seams at 2cm rather than 1.5cm, which helped a lot. As I changed the skirt closure from a side zipper to a centre back one, I had to eliminate the central back pleat, which also meant losing a little strip of fabric down each back edge.

The bodice fabric was a piece of navy polka-dotted polyester I got for 50c at a local market. I think it was about a ½ metre. Just enough. The skirt is a plain red polycotton I found at the local fabric shop. There were a couple of different shades to choose from, and for some reason all the others were either too pink, too brown, too dark or too light. Plus it’s my favourite colour, so it needed to be just right.

I think overall it turned out well. Similar enough to the original, but different enough that it meets my tastes. Thanks for the inspiration Modcloth!

A Wardrobe Dilemma

I think there’s some things in the sewing world where there’s an awful lot of ideology and rhetoric behind ideas that don’t necessarily translate to real life. Particularly, I find that sometimes there is distain for ready-to-wear clothing. I’m all for people having their own goals and aspirations to create completely handmade wardrobes, but this doesn’t always translate to real life. We don’t always have the financial resources, time or energy to put into such an endeavour. In an ideal world, every item in my wardrobe would be completely individual, handmade and loved. But there are a lot of things that I’m not only not able to make and don’t want to either.

Maybe it’s a personal thing but I love looking at sewing blogs and living vicariously through their adventures. That doesn’t necessarily mean I want to make the exact same items as them. There’s been a huge craze in the online sewing community for sewing lingerie such as the Watson Bra, which is amazing but not something I’d ever want to do. It’s beautiful but it just doesn’t appeal. Doesn’t mean I don’t want to check out what everyone else has done. That’s one of the wonders of this amazing online community.

Another thing I see people tackling is jeans, particularly the Ginger Jeans. These are all gorgeous endeavours, and the patterns are exactly what I would want if I were sewing jeans. Except I don’t want to. I just wouldn’t get the wear out of them, and the effort necessary would not translate to number of wears. It’s the same thing with swimsuits. I love the Bombshell swimsuit pattern and the many versions I’ve seen are so inspiring. It fits with my vintage and feminine aesthetic. However I’m not a swimmer (even though I live in Australia).

So I thought about what I actually wear everyday. And what I’d wear in an ideal world. In an ideal world I’d be able to wear fancy outfits everyday, dressed to the nines. I’m definitely not a casual girl, I’m a dress and skirt person, sparkly jewellery, cardigans, I love it all. I want fine cardigans and details, a lot of the time things I can’t do myself. I’d love to learn but it’s not necessarily viable. So I live somewhere in the middle between ready-to-wear and handmade. And I think that’s ok. If I made everything I wear (on top of all my other commitments), I’d probably burn out and I love sewing and creating too much to jeopardize it. Not that this means this would happen to someone else attempting his or her own handmade wardrobe (Lladybird) but that’s my reality.

Which brings me to my second point regarding my wardrobe. It’s an extension of my personality: what I like, who I am and what I want to portray to others. So when someone criticizes it, it feels very much like a personal attack. I was shopping recently, browsing not only for things to buy but also for inspiration for things to make. One particularly pushy sales assistant made a comment that I – as someone who also works in retail – probably wouldn’t. She said quite aggressively that I should try something I don’t normally wear. And I thought ‘why?’ Why should I have to try something different that I don’t want to. I like how I dress. Sometimes I experiment and sometimes I play it safe. But that’s my prerogative. We are so easily influenced by people’s opinions that sometimes we forget that at the end of the day it’s our own opinion that’s most important. And I know I need to remember that.

Pugs and Kisses

I’m in love. In love with Michael Miller. Well more specifically with his prints. I only recently discovered them and they are genuinely amazing. Not only is there loads of variety but also there’s so much playfulness behind them. Add to that that they’re quilting cotton and I’m sold. In a twist of fate, I was given a metre and a half of his fabric ‘Pugs and Kisses’ for Christmas. It’s gorgeous and so bold. So I thought I’d channel my inner Dolly Clackett and make it into a dress. Cause I can always rock a mint, pug printed dress. It’d be a nice break from my floral addiction.

IMG_2760

Isn’t it cute? Anyway, I knew I wanted to make another Kim dress. I wouldn’t even mind if my whole wardrobe was Kim dresses, that’s how much I love it. One thing I love is its versatility. The bodice goes with literally every skirt type. Initially I was tempted to do variation two straight from the pattern: gathered skirt, pin tucks and sweetheart neckline. But then I got inspired by my moustache skirt and its pleats and thought ,stuff it, I can pleat whatever I like. Since I’d used the sweetheart neckline on all my previous makes and wanted this one more preppy and less sweet, I went with the straight neckline. Now remember how I said I only had a metre and a half of fabric? Well that created a few issues with having enough fabric. In a perfect world, I’d have used 2 metres but that was not to be. Another change I made from my previous makes was rather than just adding a waistband, I lengthened the actual pattern pieces by 3cm. Which turned out to be the perfect length except that I forgot to add it to the centre front and cut out the short piece instead! Thankfully I had a good-sized scrap and was able to sew in a piece at the end. It sort of looks like extra detailing rather than a mistake. Or at least that’s what I tell myself. I sewed the bodice as instructed but instead of lining it I finished the edges with mint bias binding I found on my last trip to Craft Depot, and topstitched rather than tacking it down. I was like feeling lazy, and topstitching is sort of preppy, which was the look I was going for. The skirt was an entirely different matter. Basically, I used two widths of the fabric at the maximum length. I knew the skirt was going to be short, but I didn’t want it to be that short. . Anyway, I cut one of them in half to make room for the zipper and sewed it up into a big rectangle. And then I kind of winged it. I matched up the side seams and centre and just tried to make everything line up. There wasn’t any particular science or math to it. If I were doing it agains I’d probably sit down and work out exactly how wide each pleat would be and where it would be centred. Or use an actual pleated skirt pattern. I would have used the same as my pleated mustache skirt but unfortunately didn’t have enough fabric. Damnation! IMG_2759

I took in my usual amount along the back seam and added an invisible zipper from my thrifting adventure. This dress only continued by obsession with the Kim dress. And also the idea that if I’m not sure about making a dress out of some fabric, it’s a better bet to buy 2 metres of it than 1.5. I just about eeked it out but I’d love to be able to make the skirt just that touch longer. As it is I had to finish it with bias binding as there wasn’t enough for a turned hem. It also confirmed my adoration of Michael Miller prints. I’ve already got plans for two more dresses with his fabrics (coming soon!). Finally, I wore this dress out window shopping today and every shop we went into the sales assistants commented on my dress. I’m going to make that down as a success for sewing and individuality!

Highway to Hellebores

Full disclosure, this fabric was originally bedding. Like, two pillowcases and a duvet cover. I used about half of it to make a Cambie Dress but still had loads left, so offered it to Bee (the Sister). She came up with the brilliant idea to use the Kim dress bodice as a crop top, as it’s just that little bit to short for a full top.

IMG_2770

As you can see, it turned out pretty blooming gorgeous. To make things easier (and because we had loads of fabric to play with) we self-lined throughout, then simply turned in the bottom hem and top stitched in place. Originally we intended to add a separating zipper at the back, but despite much searching, we couldn’t find one in the right length. The one time my zipper stash has failed me!

Anyway, I came up with the idea of doing bridal buttons for a super classy touch. I just used cream ribbon to create the button loops and thankfully had just the right shank buttons to complement it.

The back is my favourite part of the dress. It turned out so well; we’ve got plans for a number of them using a bunch of my larger scraps. It’s a great way to uxe up that last piece of fabric and they’re apparently very big right now (or so Bee informs me).

As we’re both so long in the torso, the Kim bodice is the perfect basis for a whole wardrobe of crop tops! Maybe not for me, but definitely for Bee. It might not be what the By Hand London ladies intended but it looks fabulous.

A quick return to the buttons: after two wears the buttons themselves are doing great (sewn on by Bee) but the ribbon is starting to fray. Damnation! The one thing that took the most time and energy is the one thing that’s coming apart first! Do you find that happens to you? Anyway, I’m going to try and find some pre-made bridal loops that should stand up better to wear and tear.

Overall, the design was excellent, the recipient very pleased but the details just weren’t up to my usual standard. But the important thing was that I tried. Even if it means I’m not scouring Ebay and Etsy for cheap bridal button loops.

I moustache you a question

I’m such a sucker for novelty prints. The more whimsical and fun, the better. So when I saw this moustache printed cotton drill in Spotlight I knew I had to have some. I don’t usually work with drill or anything in grey (I’m a bit obsessed with bright colours and pastels, though I seem to be on a black tangent at the moment) so this was a bit out of the ordinary for me. But I still love the novelty prints.

Anywho, I got myself a metre and a half of this mustache drill. Initially I had visions of a gathered skirt with a wide black elastic waistband, but my ideas quickly shifted to pleating when I saw New Look 6242. Bee had bought it to use the bodice patterns in cosplay, but it was the simple pleated skirt that I took interest in.

New Look 6242

My measurements put me somewhere between a 14 and a 16. I like my clothes very fitted so I cut the fourteen and I still had to take it in at the waist. The pattern itself was very straightforward; I only made a few adjustments. Rather than using ½’’ wide ribbon for the interior waistband, I used some white hem facing I had on hand. It worked beautifully! For added durability I sewed two lines of topstitching at the top and bottom of the hem facing.

IMG_2758

Apart from that, I took the waist in about one and a half inches and inserted a centered zipper on one side. That’s pretty much it.

IMG_2757

I think it turned out pretty well. I’ve still got a bit of fabric left which I’ve got plans to make into a bodice with contrasting black skirt, inspired by this dress: http://vintagegaleria.com/products/mustache-dress-vintage

head over wheels mustache dress

I’m still trying to decide between a pleated skirt and a gathered skirt though. Any suggestions?


Flying North for the Winter

Ok, so it won’t be winter for ages here and I certainly won’t be able to wear today’s dress for a while but it’s all good. I’ve got a plan. Well, not really a plan more than an idea to put it to the back of my wardrobe and bring it back out when its cardigan and tights weather. One has to suffer for one’s art. Anywho, this is the dress I bought on my most recent thrifting adventure. What I loved about it was the print more than anything else.

IMG_2741

The fabric isn’t good quality and the construction (another homemade one) is a bit all over the place. Nothing a good unpicking can’t fix. Its clearly some sort of polyester blend since it doesn’t breach at all, and the sleeves and collar were horrific. Also rather than a traditional shirtdress and buttoning up the front, there was a facing and a zipper inserted in the back from the bottom of the collar to the waist. Suffice to say, it was difficult to get into. The skirt was fine. Not amazing but not terribly enough that I wanted to alter it. There really wasn’t enough fabric to try and cut a new one. One interesting little detail was that the previous sewer had used three – yes, three! – different colours of bias binding to finish the hem. Clearly a woman after my own heart in terms of cobbling things together. One day I might rip it out and replace it with plain black but for now I’m honour the time she spent hand-stitching that hem and keeping it the same. But the top had to change. Continuing my obsession with the Kim Dress (yep, that’s three in as many days) I unpicked the bodice and completely re-constructed it as a sleeveless princess seamed bodice. A far cry from the collar, clunky sleeves and umpteen darts. I counted at least 10. Having reunited the bodice and skirt, I edged the armholes and neck with black bias binding and hand stitched in place for an invisible finish. With the lowered back neckline, the previous black zipper was far too long so I replaced it with a black invisible zip.

IMG_2756

Isn’t it so much better!? I’m thinking a little jacket, tights and boots and we’ve got ourselves a great outfit. I hope that the previous sewer would be pleased with this, and wouldn’t be upset that I took apart her work. It got me thinking what will end up happening to my handmade items? I’m hoping I’ll love them for a long time, and hopefully hand them over to friends or family who will appreciate the time and effort that went into them. And if not, I hope someone somewhere finds them and gives them new life; be it by wearing them as is, altering them or completely taking them apart and making something new. Whichever way they go, I hope they’ll have a good and exciting life; I know I certainly loved them.

Crabbie Apple Dress

After the success of my Flutterby dress, I decided to take the leap and cut into my Christmas fabric. Thankfully I have a wonderful mother who loves to give fabric presents, so I ended up with 2m of this deliciousness:

Crabapple Path

Its ‘Crabapple Path’ by Martha Negley for Rowan. And it’s quilting cotton, which is my guilty pleasure. It’s from Craft Depot, one of my many fabric haunts. I didn’t see it in any other colourway, but if I had that would have had to come home too. Initially all I knew about what I wanted was that this had to be a dress. I didn’t want it to be part of an outfit, I wanted the whole outfit. Two metres seemed like more than enough. That is, until I ‘officially’ looked at the fabric requirements for the Kim Dress. As I have alluded to before, I love this pattern. I’m literally going to make myself a whole wardrobe of them with every skirt combination I can think of. Anyway, basically I need 3.4m according to the pattern. Not including lining. Eek!

Well, first things first I decided against doing a lining at all. It’s just too thick when working with quilting cotton, plus I didn’t want to die of heat exhaustion if I wore it on a hot day. Then I had to get creative with my pattern placement. In the end I used the full 2m length for the skirt and managed to squeeze the remaining bodice pieces along the top of the fabric. I even ended up with some left over!

Since I’d made the pattern before. It was a quick sew on the machine. I did my usual adjustments, taking in the back and adding a waistband. Again, I omitted the pin tucks. I think they’re just not my piece of cake. Plus I’m so in love with this fabric that I wanted as much of it on show as possible.

As I had abandoned the idea of lining the dress, my next preference was to edge it with bias binding. Not that I had a blue that matched in anyway, so I went with classic white. And enlisted the help of the Sister for all that hand sewing. She’s good at that kind of thing. I love how the edge looks without any topstitching. Topstitching is great for a shirt or something preppy for my everyday dresses I like something a little subtler. All the interior seams are pinked and the bottom hem is simply folded over twice and stitched in place. I was tempted to do a rolled hem, but thought it might turn out a bit strange with the quilting weight cotton.

IMG_2755

I’ve already worn it out and gotten loads of comments. Interestingly, I wore it on my most recent trip to Craft Depot with a good friend and had the joy of the ladies at the cutting table recognizing the fabric! I also picked up a few bits and pieces but I’ll go into that another time.

Overall, a great success. I love the dress, I love the cut and I know it’s going to work well with my pre-existing wardrobe.

Flutteryby Dress for the Sister

One of the more interesting fabrics I’ve managed to come by last year at the op-shop was a bunch of children pillowcases and sheets printed with multi-coloured butterflies.

Butterflies!

Butterflies!

I’m not sure what era, but the background is a shade of cream that’s generally not in fashion anymore so I’m guessing at the 80s or 90s. Either way it was clearly one large adult size sheet to begin with, that someone had cut up and altered for use on a child’s bed. The stitching wasn’t the most amazing but I was more excited about using the fabric. See, I love a good butterfly print. I’ve been searching for one for ages. And this completely fit the bill. I had a favourite dress when I was a little girl that was white and completely covered in butterflies. I think I’m still hoarding it in a drawer somewhere. Anyway, this dress was worn constantly and when I outgrew it, was passed down and beloved by my little sister. I have so many good memories of wearing that dress. Obviously now it’s nowhere close to fitting, so there was definitely a gap in someone’s wardrobe for a butterfly dress. My sister enthused so much over the fabric when I first bought it I thought it was only fitting that she get one. Thankfully there’s loads left for other projects; am I seeing a sleeveless shirt in my future? I recently joined in the frenzy and purchased the Kim Dress from By Hand London. Its like they thought up my ideal bodice. Easy princess seams, not too thin straps, a decent neckline, sweetheart detailing, the works. I’ve already got about 5 planned in every colour and pattern combination under the rainbow. So it seemed like a good idea to try out the pattern (a wearable muslin/calico if you will) before I cut into the seriously gorgeous fabric that lay in wait. Thankfully everything went reasonably well. I realised that there were two problems that had arose as soon as I finished the bodice construction. Firstly, the back was massively too big and secondly, the entire bodice was a couple of inches too short. Now because I’m not exactly keen to construct an entirely new bodice and let that fabric go to waste, the easiest solution was to add a waistband. It emphasizes the waist even more than the original pattern, which is always a bonus in my books. Additionally I look in the back seam about an inch either side so it fitted a little more snugly. The skirt posed another problem. The pattern asks for three yards and I had two 1m pieces available. Ah well, she’ll just have a less gathered skirt. I completely omitted the pin tucks since I knew I would be too perfectionistic in trying to get them to line up, and the pattern was busy enough already. Since the fabric was quite sheer, I followed the instructions and self-lined it, adding a waistband to the exterior fabric and lining. It was also quite relaxing to slow down for a bit and hand stitch the lining in place. Then all that was left was to add one of my invisible zippers from yesterday. Turns out it was the perfect off-white to hide in the cream. IMG_2754 Suffice to say, the Sister (or Bee as I call her) is pretty pleased. Thankfully our measurements are pretty darn close so I know I’ll make the same adjustments in the next one for myself. So that’s my judgment on the Kim dress: I love it, I’ve been waiting for it and thank god I went with my gut and ordered it the moment I saw it.

A Thrifting Adventure

On the same day as we found the pirate dress of previous post, we visited about 4 different op-shops in our area. These are my most frequent haunts. Thankfully they provide a lot of variety in quite a small area, and the catchment for donations is always of a high quality. Three of them are in one street, and the fourth (and the biggest) is about a 10-minute train journey away.

On this particular occasion, we had amazing luck in finds. The very first shop we entered (as it opened, I might add) was Red Threads run by the Red Cross. Specialising in clothing, with a few knick-knacks scattering in between, it was great fun, if occasionally a little overpriced. We must have tried on half the shop. Fortunately amongst all the things that didn’t fit or looked terrible on, there was the pirate dress I spoke about previously. Too big but with an amazing skull and crossbones print and with great potential. It’s already been taken in and is currently in hot rotation in my sisters’ wardrobe.

We then moved on to our local Salvation Army Family Store. The newest of the op-shops in our area, it has a great selection of clothing, furniture and particularly haberdashery. I think I must have struck gold: the biggest bag of zippers I’ve ever seen, priced at 50c a piece. Since that’s less than half retail (and these looked like they’d come from a shop clearance) that was a pretty good deal. But I couldn’t choose. There were too many and so many colours and lengths. So I walked timidly to the counter and asked for a price for the bag. The volunteer looked at me very strangely. Apparently she had only just put the bag out on the floor and were expecting to sell the zippers one at a time. I’m pretty sure she grabbed a number out of thin air; not really believing anyone could have uses for so many zippers. $10 for the bag. Well, that’s definitely coming home with me. Turns out there were 126 zippers in the bag! That works out to about $63 if I’d bought them individually at 50c each. Not a bad haul.

IMG_2751

Having found my first big score the day, I moved to the dress rack – my favourite area of the store after fabrics and haberdashery. I’m such a dress person, it’s a bit ridiculous. So I’m always looking for something in those racks: doesn’t matter if its vintage or new or somewhere in between. I love them all equally. Thankfully, luck was once again with me. I found the most amazing print dress. The fabric wasn’t the best quality but the print of flying geese was unusual and it was priced at $6, so I didn’t even try it on. The top was definitely not my style, so that’s definitely changing, but there’s loads of fabric to do something with.

With our treasures, we moved on to the third of the op-shops: St Vincent de Paul. This one in particular is amazing for sewing notions. They’ve literally got buckets and buckets of patterns, even vintage ones dating back to the 50s. Plus good amount of fabric. I generally find a good quality of bias binding and hem facings attractively priced at 50c per pack.

On this occasion it looked like the zipper gods were again smiling on me. Literally a whole basket of invisible zippers. Knowing how many I’d just bought, I restrained myself and only bought ten. God I love invisible zippers. They look so professional and sleek. If they have any left next time I’ll there, I’d love a few more in different colours. They only seemed to have white or bright pink. I’ll stick with white, thank you very much. At 50c apiece (do op-shops have some sort of hidden guideline for zipper pricing) they were another steal. I’ve already got plans for a few of them.

At last we hit the train and jumped off a couple of stops later at the second St Vincent de Paul in our area. The biggest shop of the four we visited, I’ve had great success there in the past, including everything from linens to formal dresses to sewing patterns, even furniture. They’ve got enough of everything that you’re about to have a good rummage without actually getting lost in the clutter. They even have the odd true vintage piece. On this particular day I think I used upon all my good luck in the previous shops, as I didn’t find anything I wanted. My sister however – my constant thrifing companion – found a number of outfits to try. None of them quite compared to her pirate dress, so we left with just a bird scarf (see, we’ve got a thing for bird printed things at the moment).

We then spend the afternoon sewing and altering our treasures (more to come in future posts!). It was the loveliest way to spend a day, and just what I needed.

Yo ho, yo ho, a pirate dress for me

Yesterday was possibly one of the loveliest days I’ve had in ages. Partly for the company (my little sister) and partly for what we actually did. Which was spend the morning searching our local op-shops and then come home for an afternoon of sewing and alterations.
This was one of the treasures we picked up:
IMG_2742
A handmade pirate themed halter dress with full circle skirt; very Dangerfield inspired. Someone had clearly put a lot of effort into this but bits of it weren’t so successfully. Some seams were tangled up, there was elastic all over the place and
the facing would not lie still. But the biggest issue was the fit. It was massively too big. See, my sister is pretty tiny in her proportions and this dress was clearly made for someone at least 2 or 3 sizes bigger than her. We didn’t manage to snap a before picture of the back but – suffice to say – it was genuinely enormous.
Because large parts of it were elasticated, it was only once the unpicking had started that we realised just how much work there was to be done. It always seems so easy when you try it on in the shop!
In the end I ended up doing quite a bit of work on it. Firstly, I unpicked the waist seam to allow me to work on the bodice and skirt separately. Thankfully the skirt was in good nick and only required a couple of pleats to get it to fit properly. The bodice was completely different matter.
It took well over an hour to unpick all the elastic. I can say one thing for the previous sewer: they were extremely thorough. Everything was well stitched in place, even if the lines were a little wobbly. After the last of the unpicking (two darts on the front bodice) it was at last time to get to fitting.
As it was so large, I started off with two large darts in the front bodice, starting at the waist and ending at the bust. I replaced to the ruching at the centre of the bust with four small pleats. Partly because I was sick of the elastic, and partly because it was easier to adjust the pleats to sit just right.
Having fitted the front, the bigger (literally!) challenge was still to come: the back. After pressing the back panels flat, I discovered that – for my sisters’ measurements – there were two more back panels than were needed. Having cut out the new centre back line, I reattached the bodice to the skirt, inserting 2 pleats in the front and 4 in the back to get a better fit.
Last of all, I re-inserted the original invisible zip and voila! One beautifully fitted dress!

Doesn't she look lovely!?

Doesn’t she look lovely!?

Doesn’t she look lovely!? It’s so her style, it’s kind of ridiculous. And we’ve got a bit of fabric left over to play with as well; always a bonus. For an op-shop dress, I’m going to say it turned out pretty darn well. Thankfully we were able to keep the main features of the dress the same, and only tailor it rather than completely re-constructing a new dress.
Looking back at the process, it was fun but definitely time and energy consuming. I must admit, there was a point when we both thought that we might just have to sew a new waistband to the skirt and leave it at that, leaving the bodice relegated to scraps. But I’m very thankful we continued on. It was definitely worth the effort.